Showing posts with label crafts/other. Show all posts

Wednesday, March 19, 2025

Colors of Redemption

Pictured: Twin Falls Temple's Angle Moroni, a symbol of gathering disciples for Christ's return.


Easter’s such a happy time--

A holy celebration.

The treats and colors of today

Can teach me more about salvation.



BLUE is the earth created by God

For us to enjoy and explore.

At the time of creation, a plan was in place

To cleanse our mistakes with a Savior.

Genesis 3:15


ORANGE is like a blaze of fire;

A guiding pillar through the night.

We look to Christ; we follow Christ.

He is our soul’s delight.
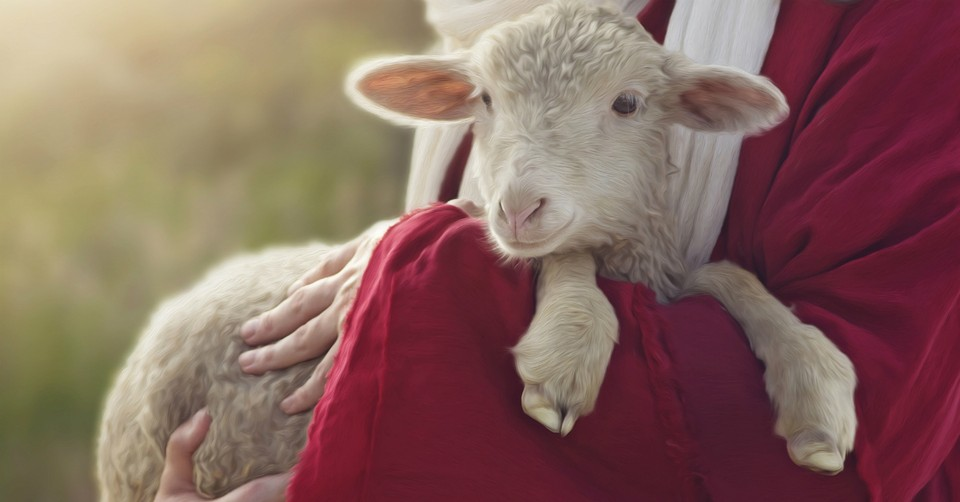
Luke 1:47

Exo 13:21


The WHITE heralds the scripture

That was spoken long ago:

Though your sins may be as scarlet,

They shall be as white as snow.

Isaiah 1:18 


GREEN
leaves grow new at springtime,

Like green palm leaves on the ground,

Made a carpet for our Savior

As He entered into town.

Matthew 21:8-9


Then Christ, at the Last Supper,

Filled a cup with PURPLE wine;

A sacrament reminder

Of His sacrifice divine.

Matthew 26:26-28

Isaiah 63:2-3 


Not a bone broke in His body

Though He bled from every pore;

RED blood of lamb, firstborn and pure

The faithful paint above their door.

John 19:32-34

Exodus 12:7 & 13 


The earthy BROWN sealed dark and shut

Represents three days

When promises afore-time made

Seemed now to be delayed.

Matthew 27:59-61


The bright, triumphant YELLOW

Never doubting, faithful friend:

Rising Christ, like rising sun

Always with us to the end.

Malachi 4:2

Matthew 28


This poem origionated as a children's book from the library when our oldest was a toddler, but took on a life of its own as I added verses and dimension from my heart. In order for kids to fully appreciate it, I find it beneficial to remind them of certain scripture stories first. This could be right before Easter Sunday, or slowly over weeks at a time.


How do we present it? We like to do this on Easter Sunday, before our egg hunt. The actual reading of the poem happens one verse at a time, while we piece together a picture and savor the treat that accompanies each color.


First, treat prep: when we shop for Easter goodies, we buy something for each color of the poem.

  • Peeps or jelly beans can cover most colors. We find blue, yellow, and white peeps to be necessesities.
  • Orange: this one represents fire, so spicy peach tajin candies are a good fit. Dried mangos are also a favorite.
  • Green: We like making apple leather with green dye because we can cut it to look like leaves. You could also do this with storebought green fruit leather.
  • Purple: because it represents wine, we like getting grape drink mixes. We've also been known to employ our own homemade grape juice here.
  • Red: we like to save cinnamon hearts from valentine's day for this one.
  • Brown: obviously chocolate. Cadbury caramel eggs or homemade reeses are favorites.
Puzzle prep: find a favorite picture of Christ (an old calendar or church magazine is a good place to start). Mount it on cardstock if necessary. Cut it into nine pieces. Print the poem, cut out each verse, and glue one verse on the back of each puzzle piece.

Final prep: One treat per child is packed into a small paper bag, along with the puzzle piece connected with that color (the first verse won't have a candy--start with that one and go in order found in poem). Place a matching tissue paper over all, and set the "gifts" under your Easter tree if you have one.

Now the kids get to take turns unwrapping presents! With each gift a treat is enjoyed, a verse is savored, and His picture unveils. 

You can use the coloring page in the printable to have young kids organize their easter treats by color.


This pet project of mine is one of my favorite parts of Easter because I created it. It comes from my heart, and for that reason it seems to carry a testament of its own for us. We've found that when our celebrations take on a personal flair, they are that much more rewarding. Get creative as you adopt ideas that resound the most with you!

Tuesday, April 9, 2024

Easter Tree with Blown Eggs

This Easter craft it a little more involved! We like using our blown eggs (especially the different sizes that come from a poultry variety!) to create an Easter tree like the one in Tasha Tudor's A Time to Keep. 

Ingredients:

  • washed eggs (of assorted sizes if you're lucky!)
  • small screw drivers, largish nails, or meat thermometers per person (for shell-drilling)
  • plate per person
  • bowl(s) for collecting innards (use these in popovers, quiche, french toast, or scramble)
  • bowl for collecting hollow shells
  • a branch for your "tree"

Directions:

  1. While holding the egg on the plate, carefully tap the top of your egg until a hole forms. The bigger the opening, the easier to remove the insides. Turn the egg over and repeat, so it is punctured on both ends. Using your tool, mix up the insides so they will more easily blow out. 
  2. Now for the gross part. Lean over the "egg collecting" bowl. Wipe the top of the egg with a clean cloth, seal your lips over the hole, and blow hard! The innards will burst into the bowl, leaving you with an empty shell. Repeat these steps with each egg.
  3. Rinse empty shells, blowing them once more to get the water out. Leave overnight to airdry, or continue to step 4 to speed dry them.
  4. Preheat oven to 200. Place empty shells on cookie sheet and bake 20 min, or until dry. 
  5. Paint them! We like to cover them with a solid color of craft paint, let them dry, then add details with a smaller brush paint pens.
  6. Set up your "tree" by stabilizing the branch in a vase or jar using rocks or marbles. Alternatively,  hang them sporadically from your ceiling.  
  7. To hang the eggs, we clip a string ~8 inches long and tie one end to a small twig. Lace the other end through the egg, then tie it onto a branch. Voila! House of Joyful Noise also has some helpful suggestions for this step. Enjoy its beauty all Easter season! 

Saturday, February 13, 2016

Valentine's Day Printables


Jokes from Capturing Joy.

Here's a fun switch-up to the regular old Valentine: pass around a laugh!

Supplies:
  • Valentine jokes
  • red, white, or pink paper or card stock
  • opt: small envelopes, such as those used for notes on flower bouquets 
Directions:
  1. Download template. Follow your printer's instructions to print the jokes on the front of the sheet and the answers on the back. 
  2. Cut into joke cards, slip into envelopes if you're feeling fancy, and pass to your favorite people!

Monday, September 7, 2015

Board Game: Don't Eat Pete


My sweet mother-in-law gave us a version of this simple game when she visited last summer. We (4 and 1 year-olds) loved it so well I decided to use it in a lesson for 9-10 year-olds on feelings, but I needed a wider array of feelings displayed. So I created my own game board! Download and print the black and white or color version.

Supplies:
Directions:
  1. Color and laminate board if desired. 
  2. Send one person out of the room. While the person is absent, select a face on the board to call "Pete."
  3. Cover each face with one treat.
  4. The absentee returns and proceeds to eat one treat at a time. When the treat covering "Pete" is picked up, everyone shouts "Don't Eat Pete!"--and the eating stops. The goal is to get as many treats as possible before being stopped.
  5. Repeat with every player.
  6. Variations. Google ideas for more variations--there are plenty of ways this game can be used to learn or discuss. Nine and ten year-olds like naming each emotion and stating whether it is an emotion from God or from Satan before eating each treat. Younger children could name emotions, colors, treat shapes, etc before eating the treat. 

Wednesday, May 27, 2015

Make Paper!

Original recipe from these cute girls.


These directions are for the most basic, least tools, and least hands-on time that I could plan. :) There are many other versions out there, so look around for more tips and ideas. This paper will be whatever color your scrap paper is (duh), so use mostly/all one color, or mix a few to see what colors you can invent. You can also add glitter, pressed petals, colorful hole punches, etc, to liven up the paper. Write carefully as this paper is more fragile than most. Have fun; the possibilities are endless!

Yield: 14-16 4x6 sheets.

Materials:
  • 4 c shredded recycled paper or lint, color of choice
  • 8 c water (or 1 part paper: 2 parts water)
  • blender
  • 9x13 pan or bin
  • picture frame that fits in pan/bin, glass and back removed
  • screening stapled over picture frame
  • towel(s)
  • 3'x1' square of felt or fleece, or larger
  • opt: food coloring
  • opt: glitter, pressed flowers/leaves, etc
Directions:

This is what my dollar store 4x6 picture frame looks like. A regular paper stapler will hold the screening well. You can staple every edge for a tighter fit, but I only stapled the left and right sides. Buy screening at a hardware store, Walmart, or use recycled from a broken window. ;)

  1. Lay fleece or felt piece on a flat surface, such as your kitchen table. Be aware the surface will get rather wet. Place pan/bin and towel(s) beside it.
  2. Blend shredded paper/lint, optional food coloring, and water until a good pulp forms. Pour into pan/bin, add optional glitter, flowers, or leaves, and gently mix with fingers. 
  3. Slip picture frame face up into pulp and slowly lift straight out of water (watch this movie for a step-by-step). Swipe off pulp from the picture frame, leaving only the screen covered in pulp. Allow a moment to drip dry.
  4. Moving to the felt/fleece, quickly flip the frame so the pulp is flat against the fabric. Squish out as much water as possible using the towel. Slowly lift frame off. Pulp should remain in a loose rectangular shape, which can be left as-is or trimmed once dry.
  5. Repeat process until pulp is gone or paper amount is sufficient. 
  6. Move the paper-bearing felt/fleece to a spot to dry (floor of an unused room, bathtub, back deck in the sun, car trunk in the sun, etc). Wait 12-24 hours, then gently peal paper from fabric.
  7. Voila! You now have personalized paper for cards, invitations, arts & crafts, etc. Trim it down with scissors for a flat edge or by ripping for a more natural-looking edge. Enjoy!

Thursday, January 1, 2015

Elephant Step Stool


Inspiration from Tots Only Etsy page.

This is my first non-food tutorial!  I hope it makes sense and that the documents work out.  Email me if you have issues.  I hope you enjoy building it as much as we did!

Materials:
  • template 1 and template 2
  • 1" x 12" x 12' board
  • 1/4" x 2" x 2' poplar board
  • coping saw
  • wood glue
  • paint or stain of choice for ears and body
  • polyurethane or seal of choice
Directions:
  1. Print template.  Cut out shapes, tape elephant together.
  2. Foot board: cut one rectangle from the 1" x 12' board, 11" x 9 1/2."  Cut two more rectangles (supports) from the same board, 11" x 2 1/4."  File and sand edges.
  3. Body: trace elephant twice onto 1" x 12' board.  Cut elephant from board.  Use a drill to make a hole in the handles and then slip the coping saw through that hole, then cut the handles.  File and sand edges.
  4. Ears: trace ear piece twice onto 1/4" x 2' x 2' poplar board.  Cut from board.  File and sand edges.
  5. Glue the supports to the bottom of the foot board.  Once dried, glue the foot board to the elephants, just under the handle holes (make sure the elephants are facing the same direction).  Follow gluing directions and use a clamp as it dries.
  6. Paint or stain the stool and ears your colors of choice.  We left the ears unstained and stained the body with English Chestnut.  Let dry.
  7. Glue ears to stool.
  8. Optional eye: drill or paint a dot.  We drilled a small hole, not penetrating the entire wood.  
  9. Seal wood (we used polyurethane) according to directions.
  10. Enjoy!  

Monday, December 29, 2014

Cloth Diapers 101

Pictured: Sunbaby diapers, size two.  Stuffed and folded.

I know this is a food blog!  But I've answered enough in-person and in-email questions that I decided I need to make this information public.  This post is by no means inclusive, but it covers the main subjects I feel qualified to address.

I cloth diaper 50% to save money and 50% because it makes me feel productive/frugal/unique.  ;)  I'd say if you loath cloth diapering, it's probably not worth the money you'd save (assuming that is your goal).  That said...

Diapers
I have found Sunbaby diapers to be the most cost-effective way of diapering one child (if you want the diapers to last through more children, you'll either have to do some sewing or buy another brand--see "performance").  They are (depending on the amount and type of inserts you buy, refer to site) $6.50/diaper AND come with two inserts.  Most "pocket diapers" (meaning you slip the absorbent part into a pocket in the waterproof cover) cost around $20, and inserts are sold separately.  So this is obviously a steal!  I've also used some types of Bumgenius, Thirsties, and Alva diapers, so let me know if you have more detailed questions about types.

Even though Sunbabies have the option to come with inserts (which is the best choice economically), I prefer folded inserts such as these big flour sack towels. The downside the these is there is more folding involved with every diaper wash, but they air-dry very quickly and I feel they are far less likely to hide buildup than microfiber inserts. Still, for one child, Sunbaby's microfiber would be a great place to start.


Pictured: newborn in a Thirsties diaper.

Wipes
My cloth wipes are homemade (like these) from flannel.  I spray a mixture of water/baby wash onto the wipe before I use it. If there is a rash, I use baby powder (carefully avoiding babe's face--doctors don't recommend baby powder because of its negative respiratory effects, or use talc-free) with a cloth diaper, or regular diapers and diaper cream (cream will ruin cloth). If you plan to use disposable wipes, figure their price into your final expenses so you don't have any hidden costs. 

Washing
I wash cloth diapers 3 times a week because that is about how often my supply runs low. I have gone for a week at a time between washes.  Rinse poop in a toilet (wearing gloves), then store in a bucket with a lid (5 gal buckets from Home Depot work great).  If the poop comes off easily, there's no reason to rinse--the poop marks will come off in the wash.  Sunbabies in particular come clean really well each time!  Hide the diaper bucket in your shower or under sink if desired.  :)  

On wash day, I wash diapers on the "light" setting with a splash of vinegar and a splash of detergent --basically a prewash (cold), and then regular wash with a detergent from this index (hot). I find Tandil from Aldi to be the most cost-effective.  Then I rinse the bucket and gloves with vinegar (or bleach). The reason for the change in water temperature is strictly economical, as per this calculator. 

I often dry the diapers on a drying rack instead of the dryer (cheaper, less chance for lasting stains, potentially longer lasting diapers), but a heated dryer is also acceptable.

Potential Year Price Breakdown (including buying the smallest package disposable diapers and wipes at Walmart for emergencies)

24 Sunbaby diapers with 48 inserts...........$12/month($144/12, diapers paid off in 1 year)
Gloves...................................................$0.91/month ($2.73, replaced every 3 months)
Tandil detergent .......................................$1.08/month (3 loads a week)
Washer.................................................$12/month (3 loads a week, $.85/load)
Emergency disposables………...........….$2.99/month ($5.97, replaced every 2 months)
Emergency wipes..................................$0.49/month ($0.98, replaced every 2 months)
Total cost per month.............................$29.47
Total cost after diapers are paid off.........$17.47

The cost of heating the water, and the fact that there is a pre-rinse of each load, makes the washer the most expensive component (after diapers).

Performance
Sunbaby diapers are a one-size diaper meaning one diaper adjusts from newborn to toilet training sizes.  I've had a snap pop off of one, but after emailing the company I had a prompt replacement sent for free!  The diapers have lasted through three children, but lately I've had to replace the leg elastics in some. If you sew, the elastics can be easily and cheaply replaced, or you could invest in a more quality diaper hoping the elastics would be longer-lasting.  My experience with any brand is that elastic will always be the first to go (unless there's Velcro involved--that doesn't last long either), so if you want them to last forever maybe plan on that update as necessary.

They work great!  I compare cloth diapering to using a towel (cloth) over a napkin (a disposable diaper).  They are more hardy for the job, but in the end it means a little more work for you (in laundry).  Also, they are cute.  :)

Nighttime can be tricky, but I have found that one Sunbaby diaper stuffed with two inserts (any more stuffing will stretch the leg holes open and increase leakage) will often work up until 18-24 months. Then I'll often use disposables for the night. But again, this process started at 18-24 months, and soon after that is potty training! So I think it works out.

Smells
The washer doesn't smell. I keep the lid always open and I try to empty my loads right away. The room with the diaper bucket doesn't smell (as long as the lid is on). The diaper bucket doesn't smell, as long as it's wiped cleaned (I use vinegar or bleach) every time it is emptied. It also helps to rotate two buckets to let the plastic breath.  

The cloth diapers (usually) don't smell. They should never smell just after a wash, and they shouldn't smell the moment the baby pees.  If they do, it's probably because of a fault in your wash routine, so check here to correct that.

Happy diapering!

Sunday, February 24, 2013

Playdough


Basic salt dough recipe from family.

Ingredients:
  • 1 1/2 c flour 
  • 3/4 c salt 
  • 1 T cream of tarter 
  • 1 1/2 T oil 
  • 1 1/2 c water 
  • opt: food coloring, glitter 
Directions:

Pour all ingredients into a large pot.  Stir constantly over medium heat until the dough pulls away from the sides and forms a ball.  Knead dough 1-2 minutes.  Store in an airtight container. Also try herb & spice scented salt dough below.


Herb & Spice Playdough

Original recipe from Craftulate


Ingredients

  • 1/2 c flour

  • 1/2 c water

  • 2 T salt

  • 1 t cream of tartar

  • 1 t vegetable oil

  • herbs & spices, choose one:

    • 2 T paprika

    • 2 T cocoa powder

    • 2 T turmeric

    • 2 t each: cinnamon, allspice, & ginger (gingerbread)

    • 2-4 T rosemary, basil, oregano, sage, or mint (blended fine for solid color)

    • 2 T lavender, blended fine

Directions

  1. Choose one herb or spice from above to color/scent your dough, or create your own!

  2. For each batch of play dough in a small saucepan, add all ingredients and mix well. 

  3. Place over medium-low heat and cook, stirring constantly, until the dough forms a ball.

  4. Remove to countertop and knead until smooth. Store separately from other colors.